
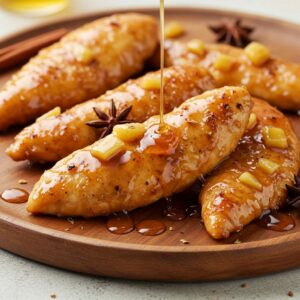
Apple and Honey-Glazed Chicken Tenders

Craving something sweet, savory, and satisfying? These apple and honey-glazed chicken tenders are here to save the day! Juicy chicken tenders are coated in a crispy breadcrumb crust, baked (or fried) to golden perfection, and then finished with a sticky-sweet glaze made from fresh apples, honey, and a touch of spice. Paired with a side of roasted veggies, mashed potatoes, or even a simple salad, this dish is perfect for any occasion.
I remember the first time I made this recipe—it was one of those “what can I do with leftover apples?” moments. I decided to toss them into a honey-based glaze and pair it with crispy chicken tenders. The result? A sweet-and-savory masterpiece that quickly became a household staple. Now, it’s my go-to recipe whenever I want something comforting yet exciting.
Why You’ll Love This Apple and Honey-Glazed Chicken Tenders Recipe
This dish is more than just a meal—it’s an experience. Here’s why you’ll adore it:
- Sweet and Savory Balance: The combination of honey, apples, and spices creates a glaze that’s rich, tangy, and perfectly balanced.
- Crispy and Juicy: The chicken tenders are coated in a crispy breadcrumb crust while staying tender and juicy on the inside.
- Customizable: Adjust the sweetness, spice level, or cooking method (baked vs. fried) to suit your taste.
- Perfect for Any Occasion: Whether it’s a weeknight dinner, game-day snack, or holiday appetizer, this recipe fits the bill.
- Kid-Friendly: Kids love the sweet glaze and crispy texture, making this dish a crowd-pleaser.
How to Make It
Making these apple and honey-glazed chicken tenders is as easy as coating, cooking, and glazing. Here’s an overview of how we’ll bring this recipe to life:
We’ll start by preparing the chicken tenders—season them with salt, pepper, and a touch of garlic powder for extra flavor.
Set up a breading station with flour, beaten eggs, and seasoned breadcrumbs to create a crispy crust. Dip each tender into the flour, then the egg wash, and finally coat it generously with breadcrumbs.
Next, we’ll cook the chicken tenders. You can either bake them in the oven for a healthier option or fry them in oil for extra crispiness.
While the chicken cooks, we’ll prepare the glaze. Sauté diced apples with honey, apple cider vinegar, Dijon mustard, and a pinch of cinnamon until the mixture thickens into a sticky, glossy sauce.
Once the chicken is cooked, toss the tenders in the warm glaze or drizzle it over the top for a beautiful presentation.
Serve the tenders hot with a sprinkle of fresh parsley or thyme for added freshness. Each bite will be a perfect harmony of crispy, juicy, sweet, and savory goodness.

Make Ahead Method
If you’re someone who loves being prepared (and let’s face it, life is so much easier when you are), these apple and honey-glazed chicken tenders are perfect for make-ahead cooking. Here’s how you can plan ahead and save yourself some time:
Prepare the Glaze in Advance: One of the best things about this recipe is that the glaze can be made a day or two ahead of time. Start by sautéing diced apples with honey, apple cider vinegar, Dijon mustard, cinnamon, and a pinch of red pepper flakes (if using) until the mixture thickens into a sticky, glossy sauce. Let the glaze cool completely, then transfer it to an airtight container and store it in the fridge for up to 3 days. When you’re ready to serve, simply reheat the glaze gently on the stovetop over low heat, stirring occasionally, until warm and pourable.
Bread the Chicken Tenders Ahead of Time: If you’re prepping for a party or event, you can bread the chicken tenders a day ahead and store them in the fridge until you’re ready to cook. After seasoning the chicken with salt, pepper, and garlic powder, set up your breading station with flour, beaten eggs, and panko breadcrumbs. Coat each tender in flour, dip it in the egg wash, and generously coat it with breadcrumbs. Place the breaded tenders on a baking sheet lined with parchment paper, cover tightly with plastic wrap, and refrigerate for up to 24 hours. This step ensures the coating adheres well to the chicken and saves you time on the day of cooking.
Freeze for Long-Term Storage: If you’re prepping for the future, freeze uncooked breaded chicken tenders on a baking sheet until solid, then transfer them to a freezer-safe bag or container. Store them in the freezer for up to 3 months. When you’re ready to cook, bake them directly from frozen, adding a few extra minutes to the cooking time. For frying, thaw the tenders in the fridge overnight before cooking to ensure even browning.
This make-ahead method is especially handy during busy weeks or when you’re meal prepping for the family. It allows you to break the process into manageable steps without sacrificing flavor or quality.
Pro Tips
Here are some insider tips to take your apple and honey-glazed chicken tenders from great to absolutely outstanding:
Use Fresh Apples: The quality of your apples makes a big difference in the glaze. Choose a crisp, slightly tart variety like Granny Smith or Honeycrisp. Their natural acidity balances the sweetness of the honey and adds a refreshing tang to the dish. Avoid overly sweet apples like Fuji or Gala, as they can make the glaze cloying.
Double-Coat the Chicken for Extra Crispiness: For an ultra-crispy crust, dip the chicken tenders in the egg wash and breadcrumbs twice. After the first coating, place the tenders on a plate and chill them in the fridge for 10-15 minutes. This helps the coating adhere better. Then, repeat the process by dipping them in the egg wash and breadcrumbs again. This double-coating technique creates a thicker, crunchier crust that holds up well even after glazing.
Bake for a Healthier Option: Baking the chicken tenders at 400°F (200°C) for 15-20 minutes ensures they’re crispy without the need for frying. To maximize crispiness, spray the breaded tenders lightly with cooking spray or brush them with a little melted butter before baking. Flip them halfway through cooking to ensure even browning.
Fry for Extra Crunch: If you prefer frying, use a neutral oil like vegetable, canola, or peanut oil and maintain the temperature at 350°F (175°C). Fry the tenders in small batches to avoid overcrowding the pan, which can lower the oil temperature and result in soggy chicken. Use tongs to flip the tenders halfway through cooking, ensuring they’re golden brown on all sides.
Add Spice to the Glaze: A pinch of red pepper flakes or cayenne pepper adds a subtle kick that complements the sweetness of the glaze. For a more pronounced heat, stir in a teaspoon of sriracha or hot sauce. You can also garnish the finished dish with sliced jalapeños for an extra spicy touch.
Serve with Dipping Sauces: While the glaze is delicious on its own, serving the chicken tenders with additional dipping sauces can elevate the experience. Pair them with ranch, honey mustard, or a creamy yogurt-based sauce for added variety. For a healthier option, serve them with a side of tzatziki or hummus.
Reheat Properly: To reheat leftovers, warm the tenders in the oven at 350°F (175°C) for 10-15 minutes to retain their crispiness. Avoid microwaving, as it can make them soggy. If the glaze has hardened in the fridge, reheat it gently on the stovetop before drizzling it over the tenders.

Storage Options
Once you’ve made these chicken tenders, you’ll want to store them properly to keep them fresh:
- Room Temperature: Store leftovers at room temperature for up to 2 hours. Beyond that, they should be refrigerated to prevent spoilage.
- Refrigerator: Store cooked chicken tenders in an airtight container in the fridge for up to 3 days. Reheat gently in the oven to retain crispiness.
- Freezer: Freeze uncooked breaded chicken tenders on a baking sheet until solid, then transfer them to a freezer-safe bag or container. Store them in the freezer for up to 3 months. Bake them directly from frozen, adding a few extra minutes to the cooking time.
Tools For This Recipe
You don’t need any fancy gadgets to make these chicken tenders, but having the right tools can make the process smoother:
- Baking Sheet: Perfect for baking the chicken tenders evenly.
- Tongs: Handy for flipping the tenders while frying or tossing them in the glaze.
- Saucepan: Ideal for cooking the apple and honey glaze.
- Measuring Spoons and Cups: For accurately measuring ingredients.
- Wire Rack: Place the baked or fried tenders on a wire rack to keep them crispy while cooling.
FAQs!
Can I use chicken breasts instead of tenders?
Absolutely! Cut boneless, skinless chicken breasts into strips and follow the same breading and cooking process.
Can I make this recipe gluten-free?
Yes! Use gluten-free flour and breadcrumbs to make the crust, and ensure all other ingredients (like the mustard) are gluten-free.
What kind of apples should I use?
Granny Smith or Honeycrisp apples work beautifully in this recipe. Their tartness balances the sweetness of the honey.
Can I bake these instead of frying?
Yes! Baking is a healthier option and still yields crispy results. Spray the tenders lightly with cooking spray for extra crispiness.
How do I know when the chicken is done?
The chicken is done when it reaches an internal temperature of 165°F (75°C). Use a meat thermometer to check for doneness.
Can I make the glaze spicier?
Yes! Add red pepper flakes, cayenne pepper, or a dash of hot sauce to the glaze for extra heat.
Variations and Substitutions
Feel free to get creative with these chicken tenders. Here are some ideas:
- Add Nuts to the Glaze: Stir in chopped pecans or walnuts for added crunch and texture.
- Try Different Fruits: Swap apples for pears or peaches for a unique twist.
- Make It Spicier: Add sliced jalapeños or a drizzle of sriracha to the glaze for extra heat.
- Switch Up the Protein: Use turkey tenders, pork chops, or even tofu for a different flavor profile.
Wrapping It Up: A Sweet and Savory Masterpiece
There’s nothing quite like the combination of crispy chicken tenders and a sticky-sweet apple and honey glaze. These apple and honey-glazed chicken tenders are proof that simple ingredients can create something truly extraordinary. Whether you’re serving them for dinner, hosting a party, or meal prepping for the week, this recipe is sure to become a favorite.
Now it’s your turn! Whip up a batch of these tenders and let me know how they turned out in the comments below. Did you stick to the classic recipe, or did you try one of the variations? Share your thoughts—I’d love to hear from you!
Apple and Honey-Glazed Chicken Tenders
Ingredients
- 1 lb chicken tenders
- Salt and pepper to taste
- 1 teaspoon garlic powder
- 1/2 cup all-purpose flour
- 2 large eggs beaten
- 1 cup panko breadcrumbs
- 2 tablespoons olive oil for baking or neutral oil (for frying)
- For the Glaze:
- 1 tablespoon olive oil
- 1 medium apple diced
- 3 tablespoons honey
- 1 tablespoon apple cider vinegar
- 1 teaspoon Dijon mustard
- 1/4 teaspoon ground cinnamon
- Pinch of red pepper flakes optional, for heat
Instructions
Step 1: Preparing the Chicken Tenders
- Start by gathering your ingredients. Pat 1 pound of chicken tenders dry with paper towels—this step ensures the breading adheres properly. Season the tenders generously with salt, pepper, and 1 teaspoon of garlic powder. The garlic powder adds a savory depth that complements the sweetness of the glaze.
- If you’re prepping ahead, you can season the chicken tenders and store them in an airtight container in the fridge for up to 24 hours. This step allows the seasoning to penetrate the chicken, enhancing its flavor.
Step 2: Setting Up the Breading Station
- Set up a breading station with three shallow bowls:
- First Bowl: Place 1/2 cup of all-purpose flour.
- Second Bowl: Beat 2 large eggs and season them lightly with salt and pepper.
- Third Bowl: Add 1 cup of panko breadcrumbs. For extra flavor, mix the breadcrumbs with a pinch of garlic powder, paprika, or grated Parmesan cheese.
- Dip each chicken tender into the flour, shaking off any excess. Next, dip it into the beaten eggs, ensuring it’s fully coated. Finally, press the tender into the panko breadcrumbs, pressing firmly to ensure the coating adheres evenly. Place the breaded tenders on a baking sheet lined with parchment paper.
- If you’re prepping ahead, cover the breaded tenders tightly with plastic wrap and refrigerate for up to 24 hours. This step ensures the coating adheres well to the chicken and saves you time on the day of cooking.
Step 3: Cooking the Chicken Tenders
- You have two options for cooking the chicken tenders: baking or frying.
Baking Method:
- Preheat your oven to 400°F (200°C). Line a baking sheet with parchment paper and place a wire rack on top (optional, but it helps the tenders crisp up evenly). Arrange the breaded chicken tenders on the rack or directly on the baking sheet. Lightly spray the tenders with cooking spray or brush them with melted butter to help them brown and crisp up.
- Bake the tenders for 15-20 minutes, flipping them halfway through, until they’re golden brown and cooked through. Use a meat thermometer to check the internal temperature—it should reach 165°F (75°C).
Frying Method:
- Heat 1-2 inches of neutral oil (like vegetable or canola oil) in a skillet over medium heat until it reaches 350°F (175°C). Fry the breaded tenders in small batches for 3-4 minutes per side, or until golden brown and cooked through. Use tongs to flip the tenders halfway through cooking, ensuring they’re evenly browned. Transfer the cooked tenders to a plate lined with paper towels to drain excess oil.
- Step 4: Preparing the Apple and Honey Glaze
- While the chicken cooks, prepare the glaze. Heat 1 tablespoon of olive oil in a saucepan over medium heat. Add 1 diced medium apple and sauté for 3-4 minutes, or until softened. Stir in 3 tablespoons of honey, 1 tablespoon of apple cider vinegar, 1 teaspoon of Dijon mustard, 1/4 teaspoon of ground cinnamon, and a pinch of red pepper flakes (if using). Cook for 2-3 minutes, stirring frequently, until the mixture thickens slightly and becomes glossy.
- If you’re prepping ahead, let the glaze cool completely, then transfer it to an airtight container and store it in the fridge for up to 3 days. When you’re ready to serve, reheat the glaze gently on the stovetop over low heat, stirring occasionally, until warm and pourable.
Step 5: Glazing the Chicken Tenders
- Once the chicken tenders are cooked, toss them in the warm glaze or drizzle the glaze over the top for a beautiful presentation. Use tongs to coat the tenders evenly, ensuring each piece is generously glazed. Garnish with fresh parsley or thyme for added freshness and color.
Step 6: Serving and Storing
- Serve the chicken tenders hot with your choice of sides, such as roasted veggies, mashed potatoes, or a simple salad. For a fun twist, serve them with toothpicks as appetizers at a party or game-day gathering.
- If you have leftovers, store the chicken tenders in an airtight container in the fridge for up to 3 days. Reheat them in the oven at 350°F (175°C) for 10-15 minutes to retain their crispiness. Avoid microwaving, as it can make them soggy.
Notes
Calories: 320 | Fat: 10g | Carbohydrates: 30g | Protein: 28g | Sugar: 15g


