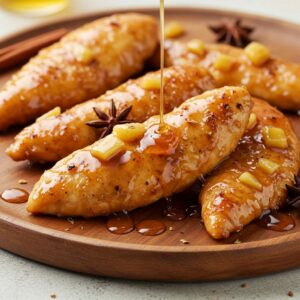
Apple and Honey-Glazed Chicken Tenders
Juicy chicken tenders coated in a crispy crust and glazed with a sticky-sweet mixture of apples, honey, and spices. Perfect for dinner, parties, or meal prep!
Ingredients
- 1 lb chicken tenders
- Salt and pepper to taste
- 1 teaspoon garlic powder
- 1/2 cup all-purpose flour
- 2 large eggs beaten
- 1 cup panko breadcrumbs
- 2 tablespoons olive oil for baking or neutral oil (for frying)
- For the Glaze:
- 1 tablespoon olive oil
- 1 medium apple diced
- 3 tablespoons honey
- 1 tablespoon apple cider vinegar
- 1 teaspoon Dijon mustard
- 1/4 teaspoon ground cinnamon
- Pinch of red pepper flakes optional, for heat
Instructions
Step 1: Preparing the Chicken Tenders
- Start by gathering your ingredients. Pat 1 pound of chicken tenders dry with paper towels—this step ensures the breading adheres properly. Season the tenders generously with salt, pepper, and 1 teaspoon of garlic powder. The garlic powder adds a savory depth that complements the sweetness of the glaze.
- If you’re prepping ahead, you can season the chicken tenders and store them in an airtight container in the fridge for up to 24 hours. This step allows the seasoning to penetrate the chicken, enhancing its flavor.
Step 2: Setting Up the Breading Station
- Set up a breading station with three shallow bowls:
- First Bowl: Place 1/2 cup of all-purpose flour.
- Second Bowl: Beat 2 large eggs and season them lightly with salt and pepper.
- Third Bowl: Add 1 cup of panko breadcrumbs. For extra flavor, mix the breadcrumbs with a pinch of garlic powder, paprika, or grated Parmesan cheese.
- Dip each chicken tender into the flour, shaking off any excess. Next, dip it into the beaten eggs, ensuring it’s fully coated. Finally, press the tender into the panko breadcrumbs, pressing firmly to ensure the coating adheres evenly. Place the breaded tenders on a baking sheet lined with parchment paper.
- If you’re prepping ahead, cover the breaded tenders tightly with plastic wrap and refrigerate for up to 24 hours. This step ensures the coating adheres well to the chicken and saves you time on the day of cooking.
Step 3: Cooking the Chicken Tenders
- You have two options for cooking the chicken tenders: baking or frying.
Baking Method:
- Preheat your oven to 400°F (200°C). Line a baking sheet with parchment paper and place a wire rack on top (optional, but it helps the tenders crisp up evenly). Arrange the breaded chicken tenders on the rack or directly on the baking sheet. Lightly spray the tenders with cooking spray or brush them with melted butter to help them brown and crisp up.
- Bake the tenders for 15-20 minutes, flipping them halfway through, until they’re golden brown and cooked through. Use a meat thermometer to check the internal temperature—it should reach 165°F (75°C).
Frying Method:
- Heat 1-2 inches of neutral oil (like vegetable or canola oil) in a skillet over medium heat until it reaches 350°F (175°C). Fry the breaded tenders in small batches for 3-4 minutes per side, or until golden brown and cooked through. Use tongs to flip the tenders halfway through cooking, ensuring they’re evenly browned. Transfer the cooked tenders to a plate lined with paper towels to drain excess oil.
- Step 4: Preparing the Apple and Honey Glaze
- While the chicken cooks, prepare the glaze. Heat 1 tablespoon of olive oil in a saucepan over medium heat. Add 1 diced medium apple and sauté for 3-4 minutes, or until softened. Stir in 3 tablespoons of honey, 1 tablespoon of apple cider vinegar, 1 teaspoon of Dijon mustard, 1/4 teaspoon of ground cinnamon, and a pinch of red pepper flakes (if using). Cook for 2-3 minutes, stirring frequently, until the mixture thickens slightly and becomes glossy.
- If you’re prepping ahead, let the glaze cool completely, then transfer it to an airtight container and store it in the fridge for up to 3 days. When you’re ready to serve, reheat the glaze gently on the stovetop over low heat, stirring occasionally, until warm and pourable.
Step 5: Glazing the Chicken Tenders
- Once the chicken tenders are cooked, toss them in the warm glaze or drizzle the glaze over the top for a beautiful presentation. Use tongs to coat the tenders evenly, ensuring each piece is generously glazed. Garnish with fresh parsley or thyme for added freshness and color.
Step 6: Serving and Storing
- Serve the chicken tenders hot with your choice of sides, such as roasted veggies, mashed potatoes, or a simple salad. For a fun twist, serve them with toothpicks as appetizers at a party or game-day gathering.
- If you have leftovers, store the chicken tenders in an airtight container in the fridge for up to 3 days. Reheat them in the oven at 350°F (175°C) for 10-15 minutes to retain their crispiness. Avoid microwaving, as it can make them soggy.
Notes
Nutritional Information (Per Serving):
Calories: 320 | Fat: 10g | Carbohydrates: 30g | Protein: 28g | Sugar: 15g
Calories: 320 | Fat: 10g | Carbohydrates: 30g | Protein: 28g | Sugar: 15g